Share
Summary:
Learning how to apply eyeshadow perfectly can completely transform your makeup game. Whether you’re a beginner or an experienced makeup lover, understanding the right techniques and color combinations helps bring out your natural beauty. This guide walks you through everything — from choosing the right eyeshadow brushes to mastering blending techniques for different eye shapes. You’ll learn how to create both subtle, everyday looks and dramatic, glamorous styles suitable for any occasion. The key to a flawless finish lies in layering shades strategically, blending seamlessly, and highlighting your eyes’ natural contours. With simple step-by-step instructions, expert recommendations, and product tips, this eyeshadow tutorial helps you avoid common mistakes and achieve a professional, polished look. By the end of this guide, you’ll know exactly how to create depth, dimension, and color harmony — elevating your entire makeup routine.
If you are a makeup freak, you definitely know how important it is to apply eyeshadows perfectly. Your eyeshadow looks basically defines your whole makeup because it is the eyes that attract everyone’s attention when they first look at you. Thus, you need to really work on your eye makeup game for a flawless makeup look and confidence.
As simple as it may look, even doing the monochrome eye makeup looks requires a whole level of expertise. And that is why I am here to help you. Here is my complete guide on how to apply eyeshadows like a pro. In this eyeshadow tutorial, I have some basic tips for you on how to apply eyeshadow. Then I will tell you what your eye shape is and how to apply eyeshadow according to your eye’s shape. Now, without wasting any more time, let’s get into it.
Table of Contents
Steps Of Applying Eyeshadow

Before we talk about the eyeshadow application, it is important for you to have complete knowledge about your eye. This way you will get a basic understanding of how eyeshadow application works and which shades go where. So our eyes have basically four areas where we can apply eyeshadows. They are:
- The main eyelid is the largest portion of the eyes where you apply the major shade you are working on. It is further divided into the inner corner, middle lid area, and the outer corner (or the outer V). To perfect your eye makeup game, you need to learn how to apply eyeshadow palette in each of these areas.
- Crease – the crease is just above the main eyelid. It is a line that forms when we open our eyes.
- Brow Bone – the brow bone area covers everything under the eyebrow till the crease. It is where you apply the highlighter.
- Lower Lash Line – it is the area under the lower lashes. If you wish to apply eyeshadow like a professional, you must never ignore your lower lash line area. Many people skip it, and this is why they are never satisfied with how their eye makeup looks.
Now that you have a basic understanding of the various parts of the eyes where you need to apply eyeshadow, let’s talk about how to apply eyeshadows. Again there are four steps of applying the eyeshadows to do simple eye makeup. These are:
1. Prep Your Eyes
No matter if we are talking about everyday face makeup or simple eye makeup, one thing you need to mind is that ‘not to prime is a crime.’ I have seen people skipping this step and ending up with messed up eye makeup looks. And then there they are always wondering: how to apply eyeshadows perfectly. You can master the techniques of doing your eyeshadows. Still, you cannot make your eye makeup lasting if you start without prepping your eyes.
Always start with a clean surface to work on. To remove any residue or dirt:
- Wipe the eye with a wet wipe.
- Apply a drop of eye primer on both eyes and massage it into the pores with your ring finger.
- Never use your index finger because it puts a lot of pressure on the eyes.
- Apply the primer in the under-eye area too.
- Bake it with a little translucent powder.
Viola, your canvas is ready for the painting!
2. Apply The Transition Shade
The next step in our eyeshadow tutorial is to apply the transition shade. If you wonder how to apply eyeshadows like an expert, well, here is the key. The transition shade is the lightest shade of the color that you want to go with. For instance, if you want to do the green eyeshadow looks, your transition shade will be light green, lime yellow, or dusky orange. If you want to do a blue eyeshadow looks, the transition color has to be light sky blue or ice blue. With a blending brush, apply the transition shade in the crease and blend it out nicely.
3. Apply Eyeshadows
The best way to apply eyeshadows is to do the outer V after the transition shade if you want to do a smokey eye. It is the darkest shade of your choice of color. For example, when doing the red eyeshadow looks or going with the orange eyeshadow looks, the outer corner is done in burnt orange or an orangish-brown shade. With a thick blending brush, apply the eyeshadow in the outer corner and blend it towards the lid’s middle area. With a clean blending brush, blend this shade with the transition color so that there are no harsh lines between the two.
After the outer corner, apply the eyeshadow in the main lid area. If you want to know how to apply eyeshadow according to the recent trends, apply a metallic shimmer or glitter in the main lid. Apply a matching matte shade in the lower lashline area too in the order: transition shade and then the dark shade. Put some highlighter in the inner corner and on the brow bone.
4. Finish Your Eyeshadow Looks
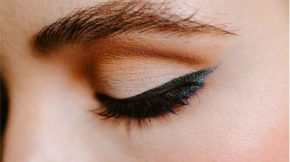
In the end, apply the eyeliner in any style that you want to. Apply an eye pencil in the waterline. Then finish off by applying a nice coat of mascara. Or you can wear false lashes too at this stage if you want to.
Follow this whole routine to create just any of the easy eyeshadow looks. You can do the pink eyeshadow looks, purple eyeshadow looks, or the bright yellow eyeshadow looks with this routine. The point being just followed these simple steps and get inspired to try different simple eye makeups. Also, since the Halloween season is here, don’t forget to try trendy Halloween eye makeup looks, keeping in mind this simple eye makeup regime.
How To Apply Eyeshadow For Different Eye Shapes

One thing that you need to know is that ‘shape matters.’ As everyone has a particular face shape, likewise, everyone has a specific eye shape. This is why the eye makeup that looks stunning on one person may not work for someone else. It is your eye shape that determines how to apply eyeshadows. Thus, if you wish to unravel the secret of how to apply eyeshadows perfectly, you need to know what your eye shape is. There are six main eye shapes as classified by experts:
- Monolid
- Almond
- Upturned
- Hooded
- Downturned
- Round
The best way to apply eyeshadow for each of these eye shapes is different. And in this eyeshadow tutorial explain how to apply eyeshadows according to your eye shape. But first, let’s figure out what your eye shape is. To know this, you need to answer four of the following questions:
- Does your eye have a crease? If you are someone who does not have a crease, you are a monolid.
- Next, if you are to put a straight line across your eyes, do your outer corners look as if they are lifted upwards or downwards? If it’s the former, you have upturned eyes, and if it is the latter case, you have downturned eyes.
- Next, if you have a crease, see if your crease is visible when you open your eyes. If your crease is not visible when your eyes are fully open, you have hooded eyes. If no, then they can be almond or round-shaped, which brings me to the final question.
- Can you see the white part around your irises when you have fully open eyes? If yes, you have round eyes, but if the white does not frame your irises, you have almond eyes.
After determining the eye shapes, let’s see what works best for each of the eye shapes. Here is a little guide on how to apply eyeshadow according to your eye shape so that your eye makeup looks flattering.
1. Eyeshadow Ideas For Hooded Eyes
For hooded eyes, the light shades look gorgeous. Try not to go for very dark shades to emphasize the hoodedness (if that even was a word). For the lashline, you need to take a dark eyeshadow and work upwards to open the eyes. Apply a waterproof mascara as the eyeshadows tend to move and smudge in hooded eyes.
2. How To Apply Eyeshadow On MonoLids
The monolid people can never ever skip an eyeshadow primer. It is mandatory so that when they apply eyeshadow, it really sticks to the eyes. Create a v with a dark shade in the outer corner and blend it inwards. Take the same shade or a transition shade to make a crease. But you don’t want a fine line so blend everything very nicely. Apply the same dark shade in the lower lash line as well, staying thicker on the outer corners and getting thinner as you move towards the inner corners. Then apply a light shimmery shade all over the eyelid. Apply the eyeliner and pull its tail out so that the eyes look more open. Apply some highlighter on the brow bone and then finish off with mascara.
3. Eyeshadow Tutorial For Round Or Protruding Eyes
For rounded eyes, there is not much that you need to worry about. Just follow any of your favorite eyeshadow tutorials and play with colors. One tip though that I have for you is that you should keep a light hand on shimmers. The highlighting shades do not go with protruding eyes. So just stay on the matte side so that your eyes look beautiful. When applying the eyeliner, do a wing. A winged liner helps create an almond eye illusion, which is what you need to try to get.
4. How To Apply Eyeshadows On Downturned Eye Shape
For people who have downturned eyes, I recommend them to use a primer with a shimmery base. This helps with visually lifting the eyes. Go with darker colors in the outer corner. Apply eyeshadow (dark-colored) just outside the outer V and blend it upwards to create a wing shape. Then do the eye makeup following new lines that you have mapped out. When applying the eyeliner, draw a thin line near the inner corners and thicken the line as you move outward towards the wing. While applying the mascara, try to focus on the middle lashes more than the side lashes.
5. How To Put On Eyeshadow for Upturned Eyes
You need to befriend the lighter eyeshadows in your palette for people with an upturned set of eyes. Apply eyeshadows on your lids as you like, and it will not be a problem unless you start using dark eyeshadows on the main eyelid. The dark shades are only for your lower lash line. As for the eyeliner, you can do a winged eyeliner, but do not go for a cat liner. Keep the wing very short. Just follow this, and you are good to go.
6. Eyeshadows For Almond Eyes
Almond eye people are sort of the luckiest among all. They have naturally gorgeous eyes that do not require much work. For them, it is more about their personal taste because anything they do, it suits the eyes. If you have almond-shaped eyes, you can follow the above mentioned four steps to achieve just any of the eye makeup looks you like.
7. How To Apply Eyeshadows On Close Or Wide-Eyes?
The goal of eye makeup is to make the eyes look bigger, deeper, and more open. This is why I gave you a detailed account of which eye makeup looks are best for which eyes. Now, if you have followed everything, yet you find something off in your makeup, then I am going to solve the mystery for you. The problem is that most people follow every trend without considering if it will suit them.
For example, the highlighted inner corners of the eyes trend. When people with wide-set eyes follow this trend, suddenly their whole makeup looks bland. The reason is that the highlighted inner corners are for close-set eyes only. And this why before learning how to apply eyeshadows, you need to determine your eye space.
Eye space is the gap between the two eyes. Based on this space, you can either have wide-set eyes or close-set eyes. Alternatively, some people have normal or average spaced eyes too. So how to determine it? The ideal way to determine the spacing is by measuring your eye with thumb and index finger. Then place the fingers between the eyes. If the gap between the two eyes is enough to fit the third eye, you have average spaced eyes. If the gap is wider or narrower, you have wide-set or close-set eyes, respectively. The people with average or close-set eyes can wear highlighter in the inner corners to make the eyes look open. When wide-eyed people do this, a lot of light reflects back, and their eyes seem to have moved further apart.
These are just some of the basic things that you need to take care of when you apply eyeshadows. It is important to learn how to apply eyeshadows correctly if you wish to enhance your features and make your makeup look flattering.
FAQs:
What is the best way to blend eyeshadow?
Use a fluffy blending brush and move it in small circular motions to diffuse harsh lines seamlessly.
Should I use a primer before applying eyeshadow?
Yes, primer helps eyeshadow last longer and enhances color payoff.
How do I choose eyeshadow colors for my eye color?
Opt for complementary shades—bronze for blue eyes, purples for green, and warm browns for brown eyes.
Can I apply eyeshadow with my fingers?
Yes, fingers work well for shimmer or cream shadows but brushes give better precision.
How do I make my eyes look bigger with eyeshadow?
Use lighter shades on the inner corners and a darker tone on the outer V for a lifted, open look.
Conclusion:
Applying eyeshadow is more than just adding color—it’s about enhancing your natural eye shape and expressing your personal style. With the right tools, techniques, and a bit of practice, anyone can achieve salon-quality results at home. From subtle daytime looks to bold evening glam, mastering blending, shading, and highlighting can help you create endless variations that flatter your features. Remember, a well-prepped eyelid and quality brushes make a world of difference in how your eyeshadow appears and lasts throughout the day. Don’t hesitate to experiment with textures and colors until you find your perfect match. Makeup is all about creativity and confidence—so let your eyes be your canvas. With these eyeshadow application tips, you’ll be able to create professional, long-lasting looks that highlight your beauty and enhance your entire makeup routine.

